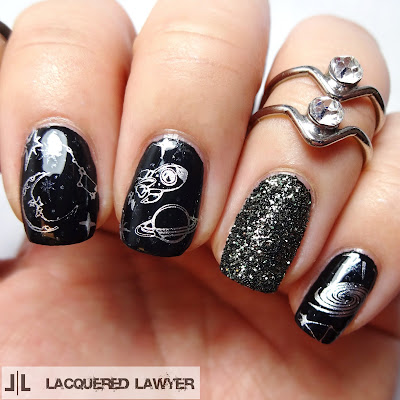
Kelli Marissa did a collaboration with Bundle Monster to create this amazing stamping plate, and this design is inspired by a mani she recently did but with more glitter!
I've never really known what to do with glitter pots until they became so popular recently. I have a ton of them that I've never used, but I think I need to start using them more. :) I received this grey glitter powder from Born Pretty Store in exchange for an honest review. The glitter comes in four different colors - black, grey/gold, dark grey, and silver. I went with the grey/gold color (#284), although it is not quite as gold as it appears on the website (perhaps I was sent the dark grey glitter?). But either way, it is a great glitter. You get 10ml of ultra thin glitter, or micro glitter. The smaller glitter is great for covering an entire nail because it is a little more sparkly, and definitely less chunky than regular sized glitter. The little container may seem small, but it doesn't take a lot of glitter to cover a nail, so this will last a long time. It has a nice screw-on cap, so you don't have to worry about it accidentally opening and spilling everywhere. As I am a fan of black and greys, I think I need to buy the other colors now.
For these or other nail art supplies, use coupon code GHLQ10 for 10% off at Born Pretty Store.
Polish Used:
- Sally Hansen Insta-Dri - Black to Black
- Jesse's Girl - shimmery grey polish
- Bundle Monster - Freedom Ring
- Base and top coats
- Grey glitter powder
- Bundle Monster stamping plate - BM-XL213
- Stamper
- Fan brush
I'm trying out the pour on glitter/no top coat look for this design. Overall it looks amazing, but the glitter does rub off during the day. The glitter rubbed off in a glitter gradient kind of look, so I still really like it. To create this look:
- Apply a black base color. For the ring finger, leave a little space on the sides of the nail as this will be covered in glitter later.
- Use a shimmery grey polish to stamp twinkly stars on all the nails except the ring finger.
- Use silver stamping polish to stamp various designs from the plate on each nail except for the ring finger.
- Apply another layer of black polish to the ring finger. While wet, pour grey glitter over the nail. Tap off the excess, and use a brush to dust around the nail.


No comments :
Post a Comment