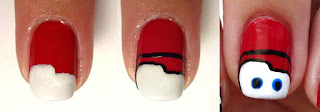
As I mentioned my last post, I went to a Frozen Cars themed birthday party. Since I always paint each hand differently, one hand was Frozen, and the other was Cars. Today I present my Cars nails featuring Lightening McQueen! Ka-Chow!

Polish Used:
- Sally Hansen Insta-Dri - Rapid Red
- Sally Hansen Insta-Dri - Lightening
- Wet n Wild - French White Crème
- Julep - Sydney
- Sally Hansen Insta-Dri - Black to Black
- Princessa - Blue
- Base and top coats
- Bundle Monster stamping plate - BM-412 (dots)
- Bundle Monster stamping plate - BM17 (checkered tip)
- Rubber stamper
- Nail art brush
- Rhinestones - red, yellow, green, and two blacks
Although it is the simplest, I think my favorite nail is the stoplight nail. To create this look:
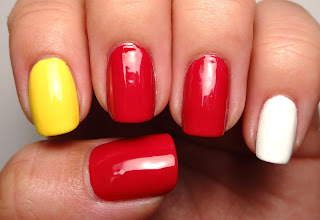
- Apply the base colors – index in yellow, pinky in white, and the rest in red.
- Index – The yellow with the orange dots is representative of some of the detailing on Lightening’s body.
- Stamp the dots with orange polish.
- Use reverse stamping to create a black and white checkered flag, and apply it to the tip.

- Middle - Lightening McQueen Nail
- Using a nail art brush, section off the white area of Lightening’s eyes.
- Use lack polish to outline the eyes, and the eyebrow line above.
- Use a dotting tool to paint his eyes. First dot a large dot of blue, then a smaller dot of black for the pupil.

- Ring - Stoplight Nail
- Use nail tape to section off a strip down the center of the nail.
- Paint the section with white polish and remove the tape.
- Apply three large rhinestones in a vertical line – red, yellow, and green like a stop light.

- Pinky - Checkered Flag Nail
- Use a nail art brush to paint black squares like a checkered flag.
- Thumb
- Apply two black rhinestones or studs to the base of the thumb.


No comments :
Post a Comment